Showing posts with label Artbooking in August. Show all posts

Sunday, August 25, 2013

Artbooking In August #4


 Week #4, the last week of the hop and I am very late posting. I am on vacation and the first two days have been filled with family functions and I didn't get done what I should have. Plus we had two days travel. Sorry about messing up the flow of this hop.
I hope ya'll have enjoyed this month long hop as much as I have.
  This challenge was to create 4 different projects using the Cricut Artbooking cartridge and any CTMH paper pack.  Our mission is to design each of the following:

1. 2 page layout 
2. Card
3. Mini Book 
4. Home decor or 'giftable' 

  We are able to choose what to make and when to post it. AND if we want to add stamps to our designs, that is OK. 
 My last project to showcase is the mini album and I kinda cheated on this one. I had an original started but didn't get it done before I left for vacation and so grabbed the mini that we got to make at convention this year. I didn't have it done either, so I finished it up on the trip up. I am sure that some of you haven't seen this and will enjoy seeing the tons of cuts that they put together for this mini. It is packed with a wide variety of the cuts that are available on the Artbooking cartridge. Sorry to those who were there and made their own.
We came to Indiana to see a new granddaughter and most of our family and all of our grandchildren are here and that is my excuse. Why didn't I get it done before since I knew I was coming? Because of a ton of other things that needed to be done before we left!  So those are my excuses and I'm sticking to them! :)

Remember this is a circular blog hop and if you get lost or confused along the way, the list is posted on Adeline's blog HERE.
If you came here from Jami's blog then your on the right track.


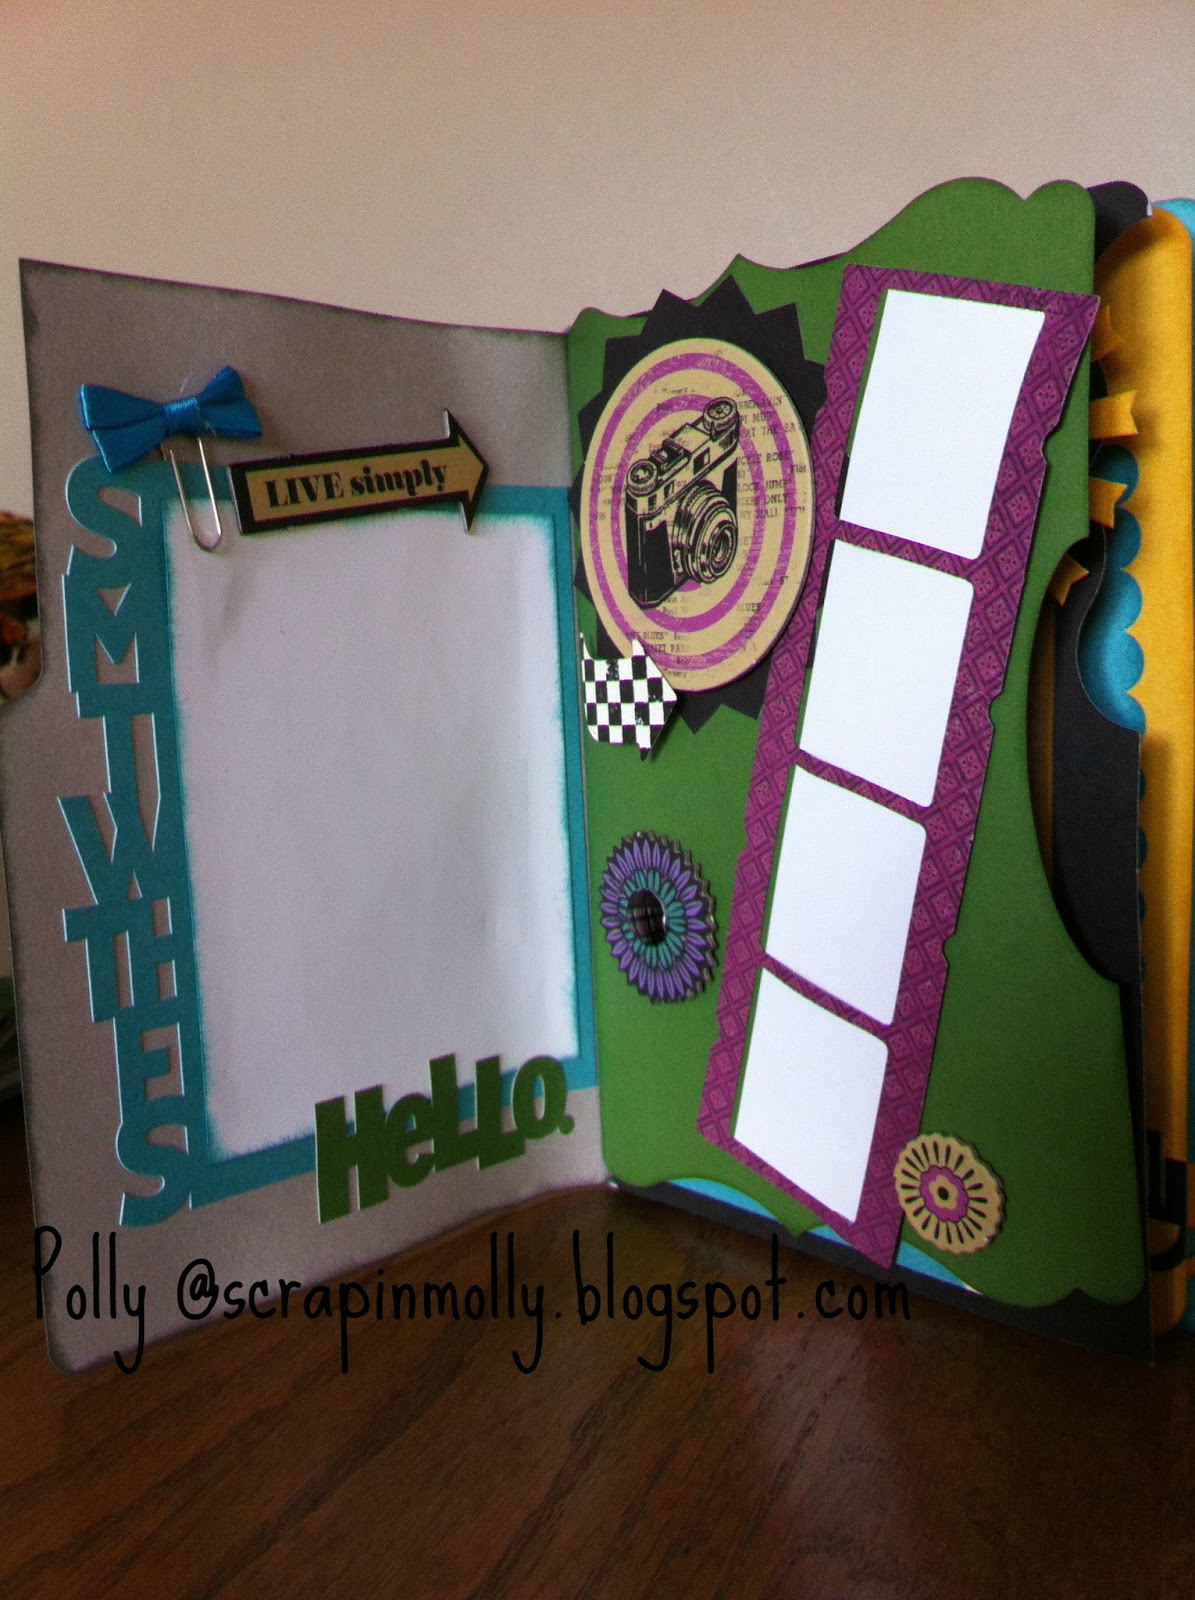
Here are some of the inside pages. This thing is packed with all kinds of cuts.
Pockets with tags.

And tags to fit inside the file folder pockets. I used some of the negative punchouts and put them in other places for added decorations. The punchouts from the arrow tabs are on the notebook page at the top and the hearts from the file folder page I glued on the tag.
This mini album also used some of the Laughing Lola complement pieces and a few pieces were stamped using theGeometric Background stamp set. But this is a really good example of all the things you can do with just this one cartridge. The pages were also all cut from this cartridge. And it is tied together with our Baker's Twine. I think I will end up punching some holes in the spine and tying it in like that for a better hold.

 Now your ready to hop on and see what Betty has created this week.

I hope you all have enjoyed this months Artbooking showcase and that your filled to the brim with creative ideas. I know I am! I just need to get back home to my craft room and get busy, but first I am going to enjoy a week with my kids, grandkids and lots of other family.     Blessings to you all,    Polly


Sunday, August 18, 2013

Artbooking In August #3

   
 Here we are again for week #3! I hope ya'll are enjoying this month long hop as much as I am! There are some very talented ladies out there! If you just happened to run across this, this week, you will need to go back and check out the previous two weeks of Artbooking hopping.
  This challenge was to create 4 different projects using the Cricut Artbooking cartridge and any CTMH paper pack.  Our mission is to design each of the following:

1. 2 page layout 
2. Card
3. Mini Book 
4. Home decor or 'giftable' 

  We are able to choose what to make and when to post it. AND if we want to add stamps to our designs, that is OK.  This week my project is the giftable item. In the previous weeks I've done the card and the 2 page layout already.
Remember this is a circular blog hop and if you get lost or confused along the way, the list is posted on Adeline's blog HERE.
If you came here from Jami's blog then your on the right track.

  I wanted to use the Kraft container that we have and decorate to hold a baby gift. I also, was wanting to do something with the Babycakes paper. I love that paper! I am thinking a couple of onesies and then socks stuck in to look like a cherry on top. I will, also probably stick in a gift card. 
Above the striped paper on the main part of the container are two of the zip strips that come in the Babycakes paper pack and then I used Bronze Shimmer trim at the top and the bottom to finish it off. I plan to put the baby's name on the lid where the striped paper is. I will probably cut the name using the Artbooking cartridge.
Products I used:
      Babycakes
   cardstock:
      Chocolate, Sunset, Buttercup
   Natural Hemp
   Bronze Shimmer Trim
   Bakers Twine- Paradise Asst.- Creme Brulee
Ink:  Slate
 

   Then to make this container more than just a gift package, I also cut a slot in the top so that it can be used for a coin bank later.

  My cuts were all taken from page 50, the "E" key and I used the Real Dial size key too. I cut the giraffe at 2" . I cut an under layer in chocolate cardstock and in sunset. I trimmed the nose off the sunset layer and glued it on top of the buttercup layer. I trimmed the chocolate layer so that just the mane and ear showed.  For the tag use the Border key, then Shift. I cut it at 1 3/4" in Sunset cardstock. "Oh Baby" was cut at 1/2"  in Buttercup cardstock. I, of course, only used the baby part. Then instead of using the word "for", I cut the number 4 using the 4 key of course! I cut it at 3/4" in Real Dial size and in Chocolate cardstock.
   Here are some close-ups.
   And here it is stuffed full.
   Now your ready to hop on and see what Betty has created this week.

   So glad you stopped in and I'd love to get a reply from you. May you have a blessed week,   Polly


Sunday, August 11, 2013

Artbooking In August #2


Well, I hope ya'll had a good time traveling through the hop last week and you were inspired to get creating. And if by chance you don't have the Artbooking cartridge and weren't quite sure you wanted it, I bet you've changed your mind by now. If not......then check out another week of inspiration.

Welcome to Week #2 of the Artbooking in August Blog Hop. Last week's artwork was so phenomenal and this week over 35 creative consultants are at it again!


  This challenge was to create 4 different projects using the Cricut Artbooking cartridge and any CTMH paper pack.  Our mission is to design each of the following:

1. 2 page layout 
2. Card
3. Mini Book 
4. Home decor or 'giftable' item 

  We are able to choose what to make and when to post it. AND if we want to add stamps to our designs, that is OK.  This week my project is a 2 page layout.
Remember this is a circular blog hop and if you get lost or confused along the way, the list is posted on Adeline's blog HERE.
Last week we had some bumps, but hopefully this week we'll be experts at this.
If you came here from Jami's blog then your on the right track.

I used the Nursery Layout on page 84. With a few changes.  This cartridge takes all the work out of making a 2 page layout! Set your machine to cut at 11" and cut any of the pieces that are shown for that layout and they will all come out proportioned for a 12" x 12" page! Is that not cool?! Saves a ton of paper. You can have a whole layout done in minutes or you can add your own creative twists if you want. I love the option to do that too.
Please excuse the lighting it is aweful. I will see if I can get better pictures up tomorrow. That's what happens when you try to do your project on the last day :(


Here are some detailed shots. I used the negative pieces from the overlay, or least a few of them, to make flowers and even some pink leaves on the tree branch!
I used Cricut Craft Room and joined the letters together from the Artbooking cartridge. And then I was able to size them to the size I wanted. Cricut Craft Room is free and your imagination is the limit of what you can do there!
Other products used:
Paper:
   Hollyhock, Blush, Slate, Chocolate cardstock
    Claire B&T retired
Inks:
   Slate and Sunset
Stamp sets:
    Babycakes WOTG D1569
    My Life D1572  comes with the Artbooking Cricut bundle
   Sweet & Lovely D1571  also comes the the Artbooking bundle
   Welcome Baby  B1325  retired- used "baby" stamp
Other:
   Paper Pouch large- retired  (used behind picture to place journaling)
   Floral Accents Z1883

Now you can travel on to see what Betty created this week. 
Thanks for stopping by and hope you were inspired. If you'd like to purchase any of these products just go HERE or if you have any questions just email me. 
I love to hear your comments. Have a blessed week,     Polly

Sunday, August 4, 2013

Artbooking In August # 1

  
Are you wondering what all can be done with the newest Close To My Heart Cricut cartridge called "Artbooking"? Well, I can tell you, there's a ton that can be done! And thanks to Adeline Brill who's put in lots of time to set up all that needs set up in order to run a hop, your going to be able to see lots of talented ladies share their artwork that they've created using Artbooking cartridge. This hop will go all through the month of August so you'll need to check back frequently. There are 4 categories: cards, 2 page layouts, mini albums, and 3-D items. Those of us sharing can showcase whichever of those items each week that we want on any given week, so it won't be Week 1 is card week and Week 2 is 2 page layout week, but will be mixed up.
  So come join us and check out a ton of lovely creations all through the month of August! We will be linked up for easy following.
  Whoot whoot to Adeline for putting this together!
   If you arrived here from Jami's blog then you are on the right track. This hop goes in a circle so you just continue down the line til you arrive back to wherever you jumped on.

  This card is a 5" x 7" size. One of the amazing things on this cartridge is the overlays. They are sized for  layouts and also for cards. But you can set the size you want by using the real dial size.Or for more creative options go to Cricut Craft Room and your imagination is the limit!
  For this card I used the real dial size and set it at 4 3/4". This overlay design is found on page 46 and it is actually for a page for the 11" x 8.5"Elegance mini album, but worked great for this card. A couple other cuts used is the sentiment label and its found on the same page right above the overlay using the Icon key. I also used the real dial size to cut this to the size I wanted. The last cuts are the flowers and they're found on page48 using the Icon key and shift key. These were cut in 1", 3/4", and 1/2" cuts. I ink distressed the edges and then spritzed them with a little water. Then using a mouse pad and a dry embossing stylus I formed them into more real looking flowers. Set aside to thoroughly dry and then glue together however many layers you want.
Other products used:
   Smoothie cardstock
   For Always paper pack
   Black Opaques gems
   black tulle which has been retired
   C1088 Comforting Thoughts stamp set (also retired)

Continue from here to Betty's blog, enjoy the show!     Blessings, Polly