Wednesday, August 7, 2013

Color My Heart Color Dare #54 and Cas(e) This Sketch #39 card

   I needed a birthday card for one of my grandson's and so these two challenges worked just perfect for what I had in mind for him.
   Here is Sketch #39.
   And then for the Color My Heart Color Challenge this week we have:  Cashmere, Champagne, and add a color.
    This was a fairly fast card.And it has a fun interactive slider. The truck will slide across the card.  The fussy cutting was the time consumer, otherwise it's very simple. 
   So there you go. Hope you enjoy.     Blessings,  Polly

Sunday, August 4, 2013

Artbooking In August # 1

  
Are you wondering what all can be done with the newest Close To My Heart Cricut cartridge called "Artbooking"? Well, I can tell you, there's a ton that can be done! And thanks to Adeline Brill who's put in lots of time to set up all that needs set up in order to run a hop, your going to be able to see lots of talented ladies share their artwork that they've created using Artbooking cartridge. This hop will go all through the month of August so you'll need to check back frequently. There are 4 categories: cards, 2 page layouts, mini albums, and 3-D items. Those of us sharing can showcase whichever of those items each week that we want on any given week, so it won't be Week 1 is card week and Week 2 is 2 page layout week, but will be mixed up.
  So come join us and check out a ton of lovely creations all through the month of August! We will be linked up for easy following.
  Whoot whoot to Adeline for putting this together!
   If you arrived here from Jami's blog then you are on the right track. This hop goes in a circle so you just continue down the line til you arrive back to wherever you jumped on.

  This card is a 5" x 7" size. One of the amazing things on this cartridge is the overlays. They are sized for  layouts and also for cards. But you can set the size you want by using the real dial size.Or for more creative options go to Cricut Craft Room and your imagination is the limit!
  For this card I used the real dial size and set it at 4 3/4". This overlay design is found on page 46 and it is actually for a page for the 11" x 8.5"Elegance mini album, but worked great for this card. A couple other cuts used is the sentiment label and its found on the same page right above the overlay using the Icon key. I also used the real dial size to cut this to the size I wanted. The last cuts are the flowers and they're found on page48 using the Icon key and shift key. These were cut in 1", 3/4", and 1/2" cuts. I ink distressed the edges and then spritzed them with a little water. Then using a mouse pad and a dry embossing stylus I formed them into more real looking flowers. Set aside to thoroughly dry and then glue together however many layers you want.
Other products used:
   Smoothie cardstock
   For Always paper pack
   Black Opaques gems
   black tulle which has been retired
   C1088 Comforting Thoughts stamp set (also retired)

Continue from here to Betty's blog, enjoy the show!     Blessings, Polly

Thursday, August 1, 2013

Close To My Heart new product Blog Hop!

  Today is the day! Close to my Heart's Autumn/Winter catalog is here! And thanks to Tresa Black for setting up a blog hop for new product. What a way to get inspired!
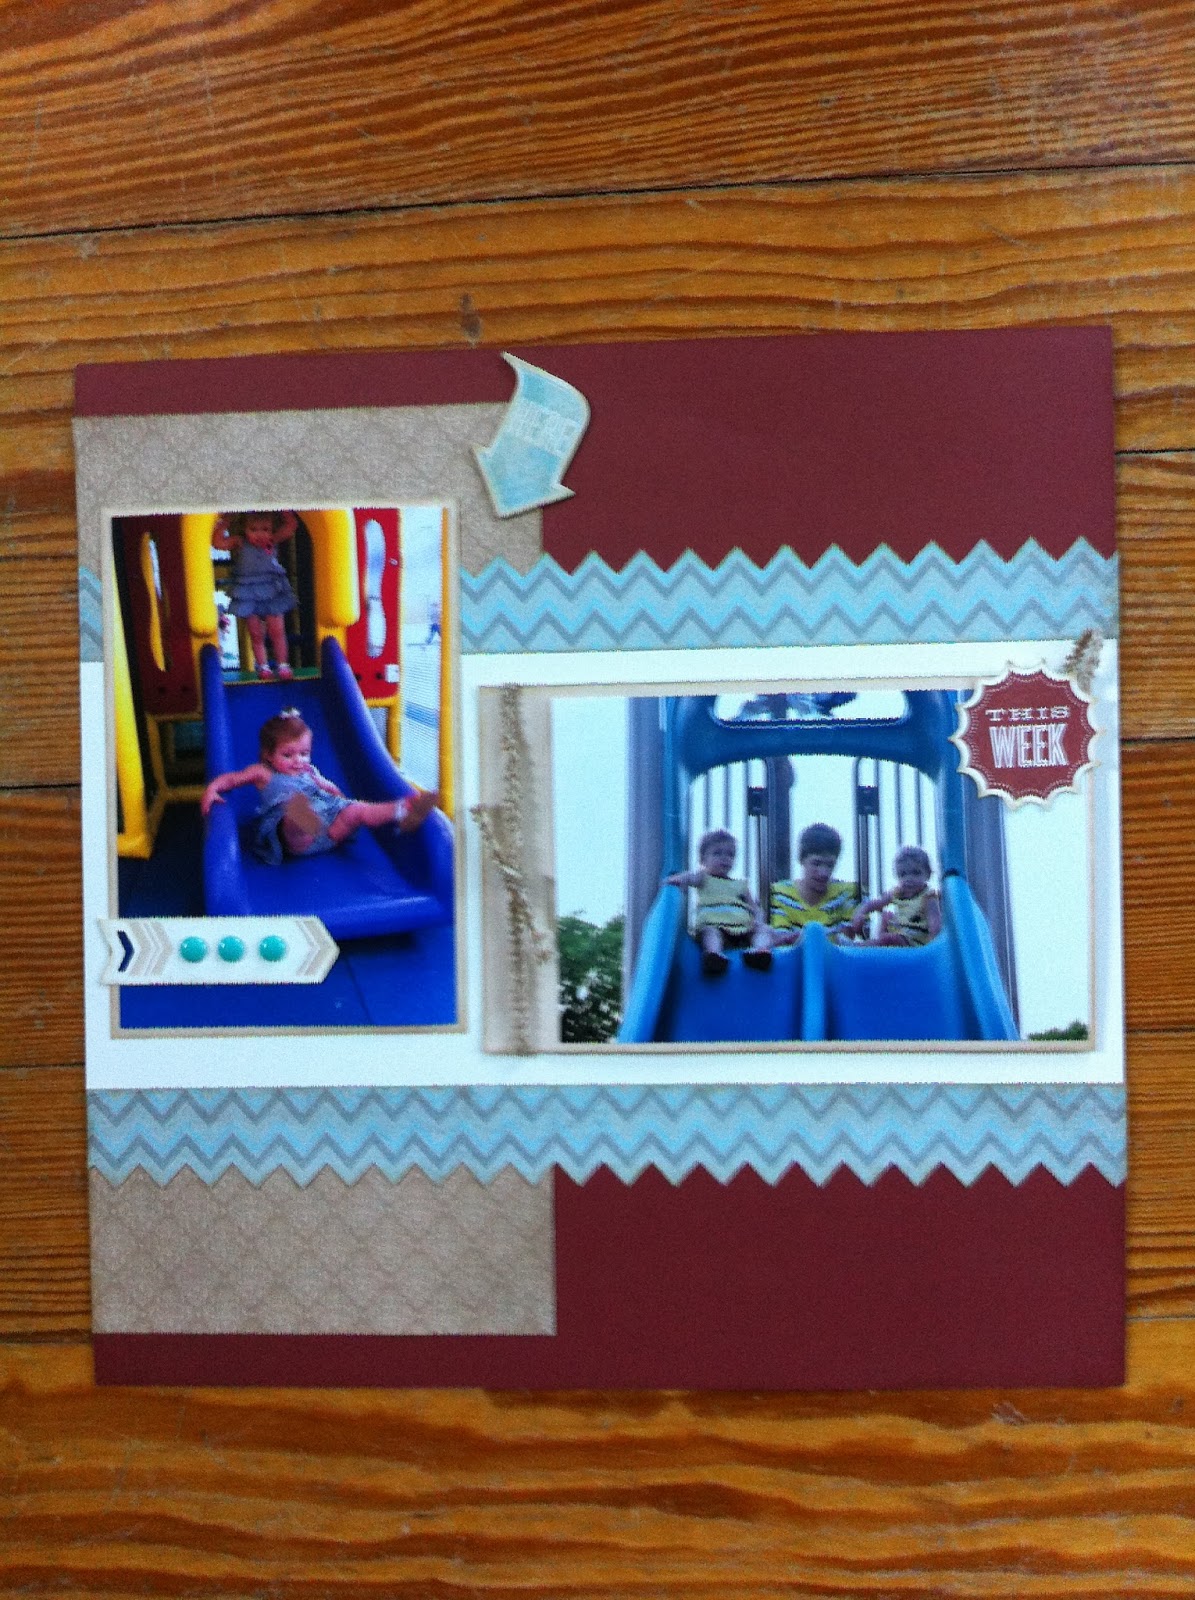
  I chose to do a 2 page layout using Frosted paper pack and Huntington paper pack. They are both so beautiful., Frosted is monochromatic and wintery looking, but can used for other themes as I have done and is open to adding other colors. Huntington- well....I just love it too. Think fall or elegant or heritage or this layout. I used the neutral damask design in that set of papers.

   I used the Huntington Workshop on the Go layout design and changed it up somewhat. Like a 4 x 6 photo on the right side instead of  2-4 x 3's. I even turned it into a small album and used a Flip Flap to get a few more photos on the page. I liked the chevron print from Frosted and thought it looked good with the Barn Red.
   The blue and grey in the Frosted paper pack are specialty seasonal colors and so when I stamped the "Good" stamp I tried to come up with a close match. I first stamped with Sky ink and then second generation stamped with Champagne ink over the Sky ink. I actually added a layer or two of second generation Champagne ink to get it dark enough, but not to dark.The same technique was used on the chipboard shape that says "HERE." That shape is a new chipboard shape that comes with the brand new Cricut cartridge, "Artbooking"!!!! Another new cartridge from Cricut and Close To My Heart! The "HERE" arrow stamp used on the chipboard element, is a stamp that comes with that cartridge. Remember, Close To My Heart's Cricut cartridges come loaded. Not only do you get the cartridge that is loaded with over 700 cuts, but you get three D-size stamp sets that coordinate with cuts and three sheets of chipboard elements to fit the shapes! That is sooooo cool!
   Some of the cuts I made using the cartridge are the arrow on the  slide picture, the "this week" which also has a coordinating stamp and inside the mini album the notepaper with coordinating stamp, the "notes" and the "classified". This cartridge is loaded with mini album pages and two page layout pages, all with coordinating photo mats and other fun elements. Loads of phrases, overlays, cool photo mats, and so much more, plus a new font. One of the features of this cartridge is that all cuts are linked to a mini album or layout are sized for that particular project so if you want to cut items for a separate project like I did for this layout (it is not a layout on the cartridge you must remember to use the Real Dial size on your machine. Otherwise, if you are doing a  layout or mini album this is on the cartridge you set the Size Dial to the size you want your page or album and all the cuts for that project are linked and will cut to proportioned size! No more guess work!
   A couple of other new products I used are the Aqua Dots Z1853. I am seeing those used all over scrapbook land. And some of the Babycakes Assortment wooden button like things Z1869. These goes with the Babycakes paper pack, another very cute set of papers for babies especially. I used stamps from two of the Artbooking stamp sets and also the stamp set that goes with Huntington WOTG.
   Here are some close ups of new product and Artbooking cuts.

I need to add my journaling still.I will write it crosswise on the paper. I am not sure I like the bright jungle gym pictures with this layout the best, but I wanted them all on one page and so I went with them anyway.
   So get to hopping all over this hop and find lots of inspiration. You can order any of these things and so much more by going to pollylewis.ctmh.com

    "This blog hop is open for members of the CTMH Blog Boosters. Please do not enter if you are not a member of the group.


Wednesday, July 31, 2013

Close To My Heart New Product Blog Hop! coming tomorrow

Tomorrow is THE day!!!! Close To My Heart's Autumn/Winter 2013 catalog goes live! And it is loaded with lots of new, fun, beautiful product waiting to help you create beautiful things! One of the biggest creative tools is the brand new "Artbooking" Cricut cartridge. It is loaded just like the other CTMH cartridges are. I have been playing with it and have so much I want to create still. I am sure this blog hop will be filled with inspirational ideas using this cartridge and so much more concerning all the new products. There are some extremely talented ladies on this hop. So be sure to come check us out!

And here is the new catalog. Be sure to have a look through by going to scrapinmolly.blogspot.com. or you can also shop by clicking the button on the right that says shop with me. For sure you are going to want to shop once you see all the creativeness that is about to explode on this hop!
And when you place an order this month of at least $50 in product you can get the chocolatey goodness August Stamp of the Month for FREE!!!!!!

Have a blessed day and get geared up to hop around all day tomorrow! I think you'll need some chocolate for the energy to do all that hopping  :)          Polly


Monday, July 29, 2013

Sympathy card - H2H and CAS(E) sketch challenges

  I barely jump back into the challenges that are out there in creative land and I am a winner already! I won over at Color Dare for the card that I created in my last post. These challenges really help me to think outside the box, to grow, and stretch.
  So here I am back again today with another card. I have several birthdays in the next couple of weeks that need cards to be made and some sympathy cards too. So what an opportunity to also join these challenges. Today I am entering this card in heart 2 heart challenge this week using "ombre" on a project. What's the you say? I will  just copy their explanation and then be sure to go over and check out some of the fabulous examples that they have there.
  I am combining that with  CAS(E) sketch # 38. I have just discovered this blog. A wonderful place to get ideas for a (C)lean (A)nd (S)imple card. So be sure to check them out HERE.


  Not much explanation needed here I don't think. I used Close To My Heart cardstocks in Hollyhock, Smoothie, and Blush. The shape was cut using the new (going "live" this week!) Artbooking Cricut cartridge. It's found on page 51. A border. I cut it at 2 1/2", 3 1/2", 4 1/2". The label for the Sentiment was cut using the Artiste Cricut cartridge. It's the 3-D Object key on page 36 and cut at 1 1/2". I used the following stamp sets. D1476 Card Chatter-Sympathy and D1088 Comforting Thoughts. The last set was the sentiment I stamped inside and it is a retired stamp set. I did emboss the card base using Cuttlebug Floral Fantasy embossing folder.

  Have a blessed day, Polly


Wednesday, July 24, 2013

My first cut on our new "Artbooking" Cricut cartridge!

  This might be my first cut, but I have so many ideas and things I want to do with this that it definitely won't be my last. I just need to hibernate in my craft room for at least a month! I could maybe get somewhat caught up! I created this card for two Close To My Heart challenges. Heart2Heart challenges this week is to use water as our inspiration. And Color My Heart color dare is to use Olive, Twilight, and Ruby. So I thought I would combine the two. Red and Blue always go well with a water theme, but I would not have put Twilight and Olive together! That's one thing I like about these color dares, especially since it is using Close To My Heart's colors. I am not an expert in color and  I can learn a lot by participating in these dares. I had to play with this some to get something that I liked and then I still wasn't sure. It helps to walk away from a project and when I come back I see it in a different light. I think the struggle to get something to come together sometimes causes you to not like it so much until you give it some time. I was dying to use the new cartridge and I have a bunch of cards that I need to make so I wanted to kill several birds with one stone. Here's what I came up with:

  I don't always get the insides decorated, but this one I did and I really liked how it turned out. This one will probably go to a son or grandson. So here is the inside:
Supplies I used:
  Card inspiration:  Make It From Your Heart Vol 1, card #24 page 44
  White Daisy cardstock
  Twilight cardstock
  Artbooking Cricut cartridge  overlay>shift  page 78 set dial at 4.25"
  Stamp sets:
               Tommy WOTG  C1546
               Just a Number D1514
 Inks:
       Twilight
       Olive
       Ruby
       Black
Harvest Bakers Twine: Olive
Foam tape

And BTW, when I came back to it, I did like it! Especially after I did the inside.

            Have a blessed day,  Polly


Artiste card

  For July's card class I decided to cut my card base and the inside pop-up using Close To My Heart's "Artiste" Cricut cartridge. I hadn't cut one of those yet. I used the card on page 51. It turned out really cute and is very quick. I set the measurement dial at 5.5" and let the machine do the work. I used Pear cardstock for the base and I stamped with the new cat's eye background stamp ( D1559 Geometric Backgrounds) with Pear ink to create the band across the front. My label was cut with Close To My Heart's "Art Philosophy" Cricut cartridge and we also have a stamp set that coordinates with that cut. ( D1524 Frame It Up.) Very handy I say. I used Smoothie ink. The flower I created using another cut from the "Artiste" cartridge. On page 44, Accent 1, shift. I started with a 2.5" cut and then kept going down in quarter inch segments. I cut 4-5 layers of one paper and then cut 2 smaller in a yellow paper for the center. Both papers are from the Dotty For You paper pack. I ink distressed the edges of all the flower pieces and then laid them out on my Versa Mat and misted them a little and crumpled them up into a ball. Then uncrumpled them some and left them to dry. Once they were dry I took the largest one and put a dab of Liquid Glass in the center and laid the next smaller one on top making sure the petals were staggered. I continued that process until all petals were glued together. You can then ruffle up the petals and get the look you want. Next I threaded some Bakers Twine in Smoothie through the button. I was shown by a friend a really cool trick to threading twine or other threads, especially if they are thicker and the holes are small.
   The blue thing is for cleaning teeth (found in the toothpaste, floss isle.)
   Thread twine through the blue cleaner thingy. Then thread blue thingy through one of the holes of the button.
Pull twine through the hole making sure you don't pull it all the way through or you start over. Pull only one end of the twine all the way through. Loop that end through the blue loop again and thread the blue thingy down through the next hole.


   Is that not the coolest?!
 
  Here is what the front of the card looks like. Oh, and I added some Glitter Glitz Stardust to the flower after I had it glued  on the card front and when I had the inside complete. You could also add the Glitz to the flower and set it aside to dry and then attach it to the card when it is dry. 
  The inside pop-up part was cut with the fantabulous embossed cardstock from the Dream Pop papers. I love that paper pack! I would hoard this paper, but I got more than one so that I can cut up parts and pieces of one pack and the other I can save to use for bigger cuts and whole page layouts. I am trying to get past saving paper cause I like it so well and don't want it to be gone. I tell myself that there is always paper coming  out that I like as well or better! No need to worry that I will run out of paper that I like and have to quit scrapbooking and card making. LOL
I added a strip of the patterned paper  to the top of the pop-up to add some dimension/texture. I used my corner rounder to create a scalloped border. This is a pretty quick simple card, but cute.
I am entering this in the Anything Goes Challenge.
                                 Have a blessed day,   Polly