Sunday, May 20, 2012

Footloose- at the Beach

For our May scrapbook class we did the LOs on page 39 and pg 42. Both of these pages have lots of details and were alot of fun to put together.  The LO on page 42 I altered to suit the photo that I had and this is what I ended up with.

and then I had more pictures that went with our day at Cocoa Beach so I created this LO using Frosted Designs Sketch Along Tuesday #41for the second page of this 2 page LO. Here is the sketch outline.

and because I wanted this to be the right page of a two page LO, I flip flopped the orientation of the elements on the page.
I will post the other 2 page LO later this week.
Enjoy!       Polly

This week its Dotty and Stripes over at H2H

How about trying some dots and stripes together? Close To My Heart has a super fun paper pack for National Scrapbook Month. 24 sheets of fun summer colors with lots of hot designs- chevrons, stripes, butterflies, large circles, labels, plus on the other side of each of these designs are dots! In coordinating colors! There's two shts of 12 designs. Lots of paper for lots of projects. Know what else is cool? Order $35 in product from CTMH and you get all this paper for just $5 more! This is cardstock weight paper. But you better hurry, cause we are very near the end of the month already and its available until supplies are gone. So, go on over to the shop button on the right and order some of this delicious paper.
This week Heart 2 Heart challenges us with dots and stripes, imagine that! So here is something I made using these papers.
The dots are on the backside of one of the sheets and the stripe is another design. I cut the tags from one of the sheets of paper and it looks like this.
What a lot of fun just on that sheet.
Hope you enjoy!     Polly

Tuesday, May 15, 2012

Sewing class-second project: Peasant dress

For our second project in the sewing class I'm teaching one of the girls found a really cute peasant dress that Zulily had advertised. So I went looking for a pattern online. I found one for 3 & 5 yr olds here. A really fun and simple dress and so many things you can do to change it up. I should have taken pictures of all the girls creations. They each chose the fabrics that they wanted to use. Here is the one I made and I adjusted it to be smaller so that it would fit one of my beautiful granddaughters. I have another to make and it will be in coordinating fabrics.
I am hoping it will fit these little princesses.
I will post the other dress when I can get it finished.
Thanks for stopping by.            Polly

Wednesday, May 9, 2012

Another Mothers Day card

I got the inspiration for this card on Pinterest. I spend so much time on there and I can't decide if its a big waste of time or if I learn and see enough inspiration on there to validate spending as much time on there as I do. There is a ton of inspiration and so much information on so many different things!
 I admit it, I'm addicted, but I have gone for days without looking too.
Anyway, back to this card-it was posted on stampinconnection.com which is a Stampin Up demonstrators community. And since I'm not a Stampin Up Demonstrator I can't log in and give credit where credit is due. So I copied it the best I could using Close To My Heart products.
Pemberly paper pack.
Stamp sets: the sentiment  Simple Beauty D1261 (retired)
                                         Rosy Regards DB1369
                                         Card Word Puzzle C1494
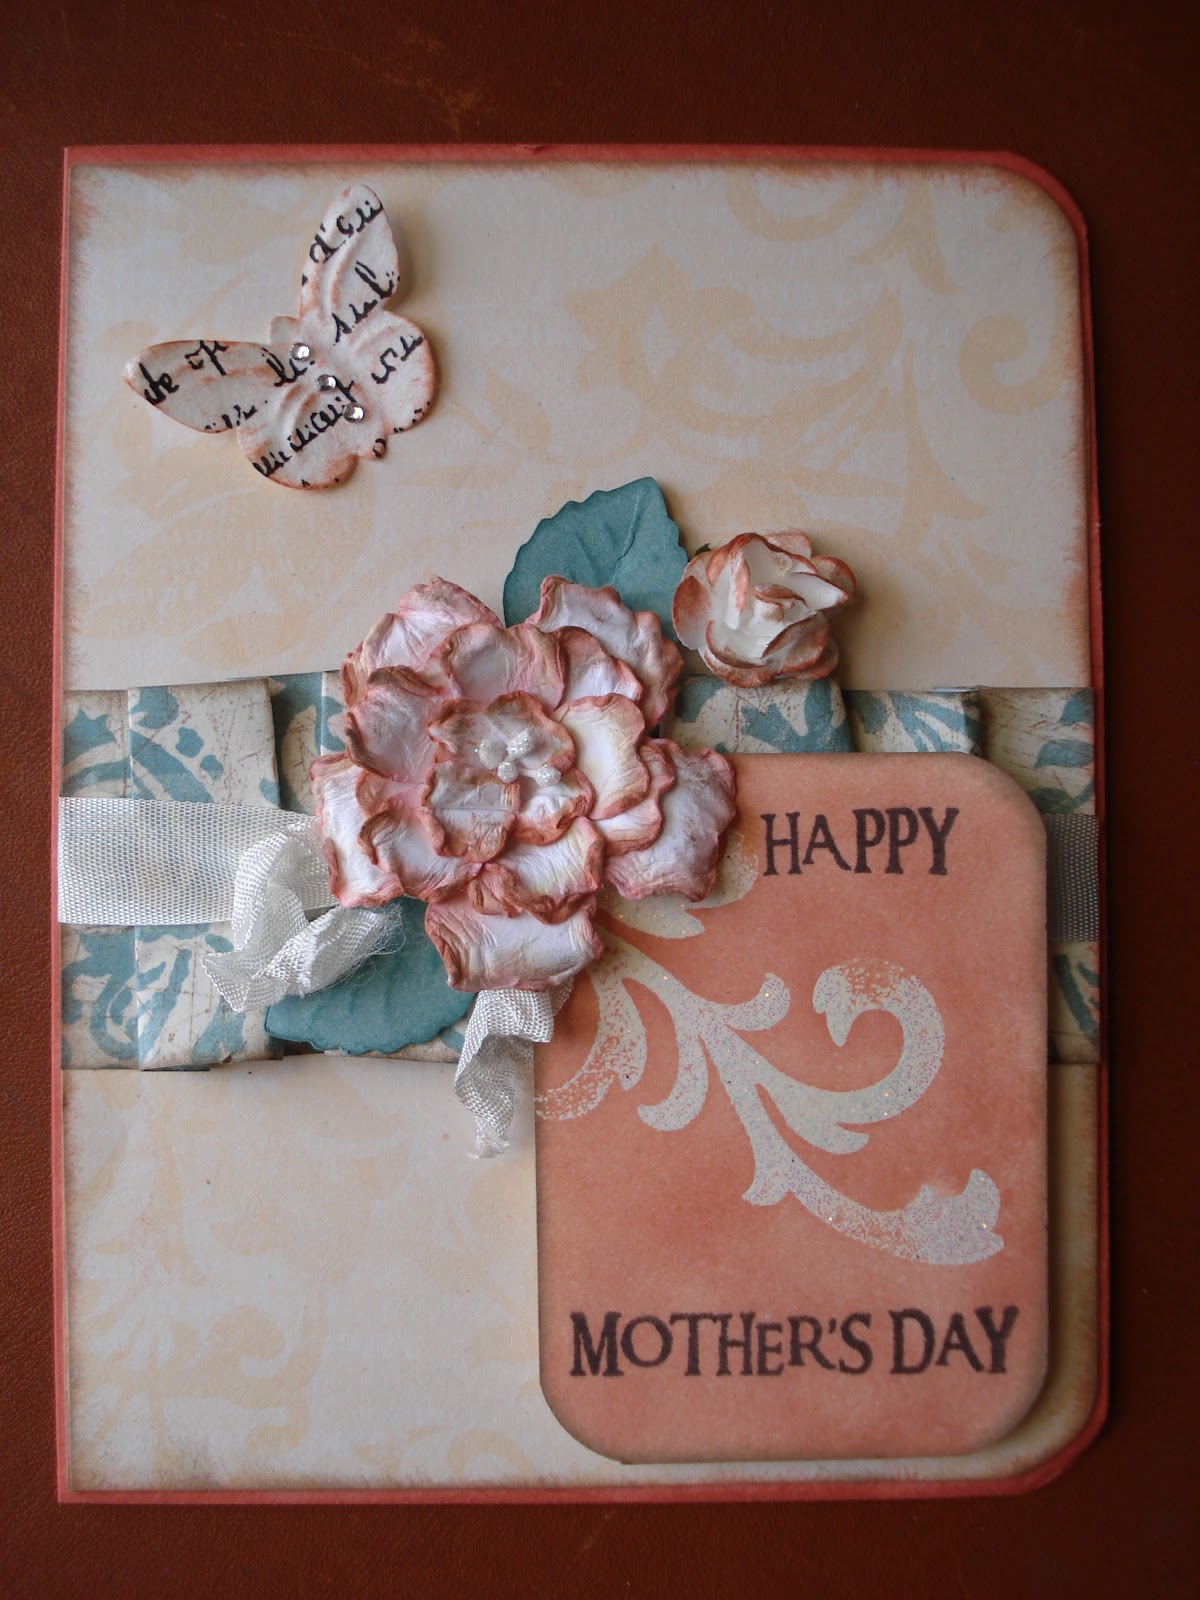
I created the roses by first embossing  on white cardstock the rose from Card Word Puzzle. I used Silver Pearl Z678 embossing powder (no longer available through Close To My Heart, but it's a Ranger product) I love the look. It's white with a pearlized sheen.
 I didn't have a Honey ink pad, but I do have the reinker- not sure what the deal is there. So I dropped a drop of ink on a tissue, dabbed it off on a scrap and then circular rubbed it in on the embossed rose. I wanted the center of the flower darker and some of the edges. I did the inking before I cut the flowers out. There's only one stamp size of the rose so I created two and then cut one down when I had it colored the way I wanted it. I used the same tissue technique and used a little Autumn TerraCotta ink in the centers of the roses.
Seam Binding Z1732     and a bling brad  z1360  pretty much finish it.
It was a little difficult for me not to do some ink distressing on the edges of the papers! I caught myself a couple of times getting ready to start inking, but the inspiration card didn't use any and I really liked everything about the card and so I reframed. It really gives a clean look without the distressing. So here it is....
Another card for the Heart 2 Heart challenge for this week
Enjoy      Polly

Heart 2 Heart challenge - Mother's Day card

Heart 2 Heart challenges has a very appropriate challenge for this week. Let's remember our Mothers and all that they mean to us and all that they do or have done for us. We'd be in a very bad way if we didn't have mothers in our lives, in many aspects. I am blessed to have my mother and mother-in-law still living and they've both played big roles in my life. I don't do enough to show my appreciation for them.
I made this first card and used it for two card classes that I had recently. I have had a lot of fun making these Prima-look-alike flowers and wanted to teach my crafty ladies how to create them too. Here is where I got my inspiration for them. http://simplypaperandcreativity.blogspot.com/2011/06/wild-roses-tutorial.html  she has several different flower tuts. I am sooo in love with these flowers. They become hard after misting with water and creating the scrunched, pinched leaves and drying and so aren't easily crushed, can be made with cardstock and/or patterned paper. I haven't tried the lighter weight paper. The patterned paper I used was double sided cardstock weight paper. You can ink them, glimmer mist them and more. Best of all they can be cut using a flower shape in the Art Philosophy cricut cartridge!
 I used some older Close To My Heart papers:Perfect Day and Veranda
The leaves were cut from the Art Philosophy cart also. I textured them using a stylus and a mouse pad and then inked them.
I made the flourish using VersaMark and clear embossing powder with some glitter mixed in with it.
I started out with a rectangle of  Colonial White cs. I rounded the edges, stamped and heat embossed the flourish and then inked over it all using Sorbet ink and a sponge dabber. Then stamped the sentiment.
here are a couple of close ups:

Entering this in the Anything Goes challenge #66 Wings and Things and also
Frosted Designs Fabulous Friday challenge. It's a recipe challenge. 
 

  I used ribbon, glitter, butterfly and flower.           Hope you enjoy!       Polly

Monday, May 7, 2012

Hello!?.....I'm back.....

First off, to those who may have been wondering if I dropped off the edge of the earth, I apologize, life has just been happening in a big way here. Partly due to being gone for 6 weeks this summer, I think that some of the things that didn't get done while I was gone have just now been catching up to me. Things like bookwork and then getting the tax paperwork done and ready to send off. This is exactly one of the reason that I procrastinated in even starting a blog, but that's not really a good enough reason not to start a blog.
 Adding another person back into your household adds more work than I anticipated and of course somewhat changes some of your routines. Our oldest son moved back here to Texas from Indiana. I am totally thrilled with that and am not complaining, just stating facts. I do more cooking and more laundry and more "hey Mom, can you do............" He is dating a girl down here and we are thrilled with that and know that his being here in our home will only be a temporary thing. He will soon be 23 and he's been on his own for about 5 years previous to this move.
One of those classes is a sewing class for the ladies at our church. Most are beginners so we started with a beginner pillow. We did a lapped back and the flower on the front gave them a chance to work with ruffles.
Here is the sample I made. Everyone else made theirs bigger, but I already had this pillow form. I also want to make several pillows in several sizes and put them together on a bed.
This is just a 12" pillow. I used Toile Decorator fabric for the base and then muslin for my ruffled flower. And old button finishes the center.